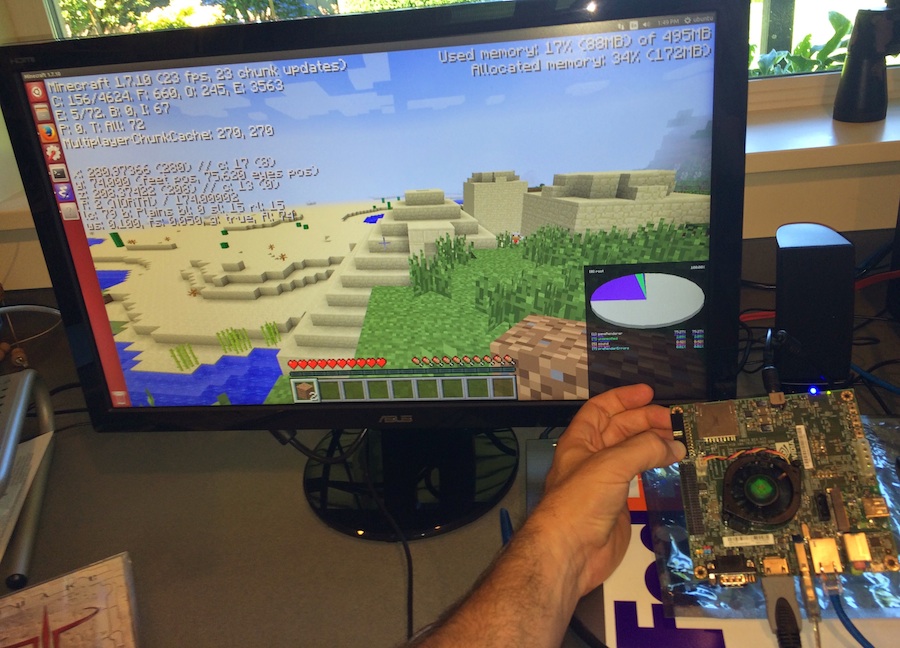
Minecraft On Jetson Tk1

Call me crazy, but with an NVIDIA Jetson TK1 in my hands, the first thing I wanted to try running was Minecraft. The real Minecraft, not the “Pocket Edition” Minecraft that normally runs on ARM processors. It took me a few days to figure out how to make it happen, but I’ve now got it running at a very playable 25-30Hz at 1920x1080. Hopefully the instructions below can get it working for you, too.
Just to be clear, you will need to have purchased a Minecraft license to get this running. Also, this is not a simple hack. Please don’t attempt this unless you have some intermediate linux knowledge and understand the commands you are running.
Install Java
First, Minecraft requires Java. I found you must use Oracle’s Java for reasonable performance–it is 10x faster than OpenJDK Java (2-3fps vs 25-30fps). Maybe OpenJDK will see this and use it to tune their implementation.
Following these webupd8 instructions to install Java worked perfectly for me:
sudo add-apt-repository ppa:webupd8team/java
sudo apt-get update
sudo apt-get install oracle-java7-installer
Then, make sure to update your JAVA_HOME directory. I put this into my .bashrc:
JAVA_HOME=/usr/lib/jvm/java-7-oracle
PATH=${PATH}:${JAVA_HOME}/bin
Build LWJGL
Next, Minecraft requires LWJGL. Compiling it requires only one small edit to the code and I was grateful to follow in the footsteps of this developer’s instructions.
These are the packages I needed installed: (Oct 2014 update–added libxt-dev)
sudo apt-get install git ant
sudo apt-get install libxcursor-dev # X cursor management library (development files)
sudo apt-get install libxxf86vm-dev # X11 XFree86 video mode extension library (development headers)
sudo apt-get install libxrandr-dev  # X11 RandR extension library (development headers)
sudo apt-get install libxt-dev      # X11 Toolkit Intrinsics library (development headers)
Get the LWJGL source from Github:
git clone https://github.com/LWJGL/lwjgl.git
Before we compile, there is a bug in the LWJGL linux build that we
need to fix first. In the file platform_build/linux_ant/build.xml
you need to change this line (near the top):
<property name="libs32" value="-L/usr/X11R6/lib -L/usr/X11/lib -lm -lX11 -lXext -lXcursor -lXrandr -lXxf86vm -lpthread -L${java.home}/lib/i386 -ljawt" />
to be this instead: (just changing the i386 to arm)
<property name="libs32" value="-L/usr/X11R6/lib -L/usr/X11/lib -lm -lX11 -lXext -lXcursor -lXrandr -lXxf86vm -lpthread -L${java.home}/lib/arm -ljawt" />
These are some compilation flags that ant passes to gcc when
compiling. There isn’t any $JAVA_HOME/lib/i386 directory on Jetson.
Instead the compiler needs to look in $JAVA_HOME/lib/arm. We’ll
just fix this locally while LWJGL works on Issue
74.
Finally, due to a different “apt” binary in both the java sdk and in
/usr/bin, there needs to be something done for your path while you
build with ant. The following worked for me.
cd lwjgl
env PATH=${JAVA_HOME}/bin:${PATH} ant
The above should build a libs/linux/liblwjgl.so native shared library.
Build OpenAL
For a while, I thought this would be all I needed for LWJGL and I was
confused as to why sound did not work. But, LWJGL doesn’t actually
build libopenal.so, it just packages up an x86 shared library.
See https://github.com/LWJGL/lwjgl/tree/master/libs/linux
So, we must build OpenAL. For this, I needed to get cmake.
sudo apt-get install cmake
Downloading the source and building was no problem at all:
wget http://kcat.strangesoft.net/openal-releases/openal-soft-1.15.1.tar.bz2
tar xvjf openal-soft-1.15.1.tar.bz2
cd openal-soft-1.15.1/build/
cmake ..
make
This should create a build/libopenal.so.1.15.1 native shared library.
Package Your Native Libs
Now, find a convenient location to store your LWJGL and OpenAL libraries. Copy the libraries you’ve created to that location. Note that libopenal.so changes names to drop the version number.
For example: (adjust paths as needed)
mkdir -p ~/Minecraft/Natives
cp ~/Dev/openal-soft-1.15.1/build/libopenal.so.1.15.1 ~/Minecraft/Natives/libopenal.so
cp ~/Dev/lwjgl/libs/linux/liblwjgl.so ~/Minecraft/Natives
Preliminary Run of Minecraft
Find the latest Linux Minecraft.jar from
https://minecraft.net/download and
save that in the ~/Minecraft directory. Run this via java -jar
Minecraft.jar and try to start a game from the launcher window. It
should download all the files necessary into the ~/.minecraft
directory in order to run the latest version of Minecraft. But, it
will complain when it can’t find the arm native libraries. Just quit
after you try to launch a game and it fails.
During this process you should see a lot of output to your terminal. One piece is the java commandline it uses to start the game from the launcher. I’m sure this commandline will change in the future, so make note of this and if you are running a version of Minecraft different than 1.7.10, you will need to adjust.
I’ve created a gist here that has the commandline that I’m using. (Oct 2014 update–added Version 1.8 support)
Basically, all I did was change the -Djava.library.path to point to
our native libraries and add the last part of the commandline starting
with --username. This last bit is not listed in the terminal
output. These are additional parameters that I only found via a
google
search. Again,
I’m sure these options will change going forward. As versions change,
perhaps we can work together to maintain these commandlines via the
gist link above. Who knows, perhaps Mojang will see this and decide
to include arm native libs–wouldn’t that be great?
Note that you will have to replace xxx and yyy in the commandline
      --username xxx \
      --accessToken "yyy" \
xxx is your username that you used to register Minecraft. The yyy
token is from the ~/.minecraft/launcher_profiles.json “clientToken”.
It is a long string that should have been setup when you did the first
run of minecraft.
Run Minecraft
Copy the
commandline
to ~/Minecraft/run.sh and chmod +x run.sh. Running that file
should allow Minecraft to find the native files and run on your TK1.
Enjoy!